Apply Time Zones to a Door
(in a Department)
You must add some Time Zones to each of these doors to complete the department set up.
- Using the down arrow on List 1 - The Departments List, select the department title, e.g, Sales Staff.
- Select (by clicking on it) a door in List 2 - the Doors List
- Click on the large button ‘Modify Door/Time Zones’ button on List 3 - the Time Zones List.
- A new window opens.
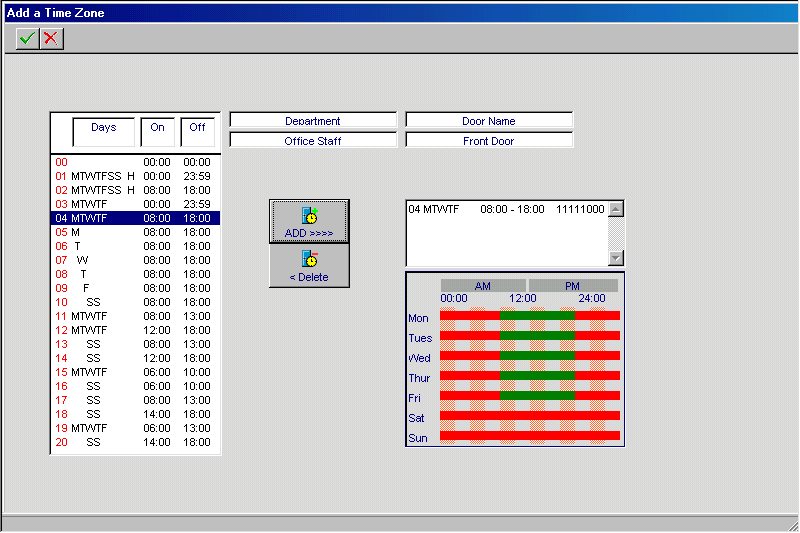
- Highlight a Time Zone (in the left hand list) you wish to include, then click add button.
- You will notice the the graphical display confirms your selections
- Repeat step 5 & 6 to add up to 4 Time Zones.
- When done click the green tick button. The window will close.
- Repeat steps 2 - 7 for all doors in the centre list - The Doors List
Once the above has been completed the Department is ready for use. Any card holder can become a member of this new (Sales Staff) Department. See Add Card Holder
TIP
Card Holders in the department Sales Staff will gain access to the selected doors during the times specified.
TIP
If a door in a department does not have at least one Time Zone attached then no access will be given to that door for Card Holders in that department.
TIP
If a department requires access to a door at all times, use Time Zone 01.
