Getting Started
Departments are the mechanism used to link DOORS & TIME ZONES. By grouping time zones (up to 4) to a door, you can create a versatile structure for card holder access.
Each card holder belongs to a Department, they therefore automatically have all the access privileges associated with that Department.
You may have up to 99 departments with 500 card holders in each.
The key to understanding how people are given access through doors is by understanding the department structure. When an individual is given an access control token it is not the case that the access rights are applied directly to him or her, people are stored in departments which in turn hold the access rights.
TIP
A department is a collection of people with identical access privileges
It is the department that specifies access in two broad parameters,
1) Which doors can department members go through, and,
2) what times can they go through these doors.
Before assigning individuals to departments we must first consider how many different departments (groups of Card Holders) are required.
TIP
For easy management try and keep the quantity of departments to a minimum.
An example could be a company with 30 employees of which 10 are office staff, 10 are production staff and the remaining are sales people. It may be the case that you decide that these three work types require defined different access rights and therefore need departmentalising giving you three departments.
- Office Staff
- Production Staff
- Sales Staff
All Card Holders will then be assigned to one of these three categories.
We have just seen how to consider people with identical access requirements as a single department, we will now look at how to assign rights to that department.
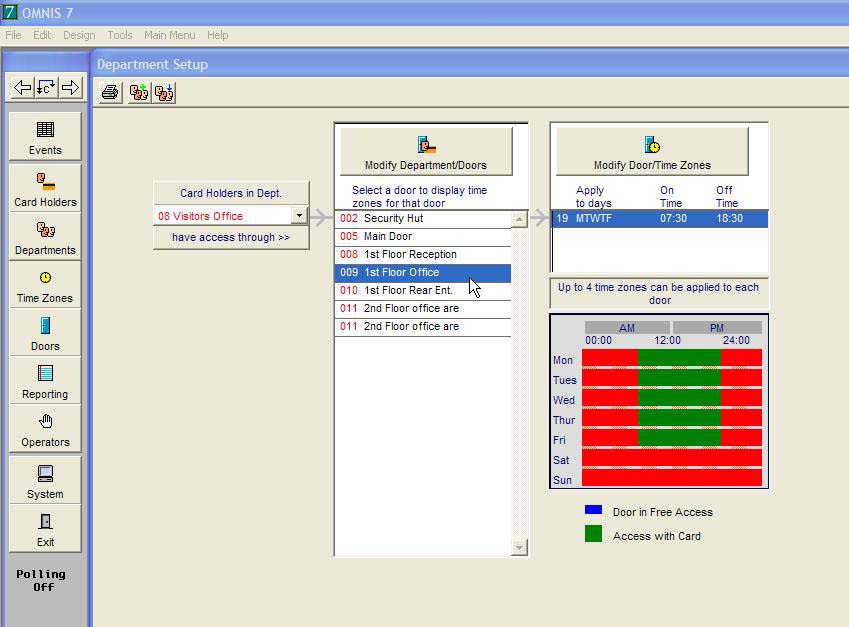
Looking at the department window (above) we can see three areas form left to right. These are the three parameters required for any department,
Departments List - (left)
The Departments List displays the Department name (drop down list)
Doors List - (centre)
The Doors List displays the Doors applied to the selected department..
Time Zones List - (right)
The Time Zones List displays the Time Zone(s) applied to that door in that department.
The first parameter is simply a list of doors, it may be all the doors on a site, a selection or even a single door. The second parameter uses a Time Zone or a collection of Time Zones (to a maximum of 4) for each door in the list. A Time Zone is a 7 day software time clock with the following attributes,
Start time - Stop time - Days of the week e.g. 08:00-17:30 MTWTF
The above example is a Time Zone that is valid from 08:00 hours in the morning to 17:30 in the afternoon on days Monday to Friday. There is an eighth day option called holiday (H), if this is included then the Time Zone will also be valid on a holiday.
A holiday is date orientated rather than part of a repeating 7 day cycle, if a pre-programmed date occurs such as Christmas Day it is the holiday specifier that will be required to validate the Time Zone regardless of the day of the week this date falls on. Imagine for a moment Christmas Day falls on a Tuesday you may not want the Time Zone to be valid as the security requirement may be that of a Saturday or a Sunday. The holiday specifier allows you to pre-define forthcoming holidays and thus change the normal 7 day cycle when the dates occur.
Default Department (Keyholders)
The department '01 Keyholder' is already set up to allow 24 hour access through all doors. This means that it is associated with every door and each door is associated with Time Zone '01' (see Time Zones). Therefore any card holder who is in the 'Keyholder' department will have 24 hour access through all doors.
